 Newshot

Maisie likes to touch the litter box while it is running. I would prefer that she find something else to do during that time.
My idea was to bring the litter box into Home Assistant, add some buttons, and eventually use presence sensors to start a cleaning cycle when she is in another room and distracted. There are probably many more automations I will come up with once I have that working. First, I needed a way to talk to the box.
The phone app already knew how to do everything I needed. I started by watching its traffic with Wireshark and inspecting HTTP requests with HTTP Toolkit, then decompiled the Android app to understand the parts I could not reproduce from the traffic alone.
This turned into two related projects. I needed to reproduce the signed HTTP requests used to access account and device data, then rebuild the binary messages used to operate the box over MQTT.
Recreating the HTTP Requests
The HTTP traffic exposed devices on the account, configuration, waste drawer levels, and records of litter box visits. I could also see how authentication worked. The app logs in to obtain a token, then includes that token in the Authorization header on later requests.
My first attempts to reproduce the requests returned 401 Unauthorized. Copying the endpoints and headers from a capture had not been enough. A 401 did not identify exactly which part of my reproduction was wrong, so I went back to comparing the app’s requests.
The X-UBT-Sign header kept changing. I could not work out its algorithm just by looking at the captured values. To generate my own requests, I needed to see how the app created it.
I used JADX to decompile the Android APK, then searched the recovered source for the header name and familiar backend strings:
        grep -R -n -E 'X-UBT-Sign|catbox-server|airrobo-home' \
  furrytail_decompiled/sources
The header name gave me a useful place to start in the decompiled code. It appears in sources/com/ubtrobot/infrastructure/a0.java, an obfuscated class whose retained metadata identifies it as UrcsSignInterceptor from HttpInterceptors.kt. The interceptor builds the signature and attaches it to outgoing HTTP requests. Its hashing helper, a.b.t, calls MessageDigest.getInstance("MD5").
The decompiled code shows the final header being assembled and added to the request.
From sources/com/ubtrobot/infrastructure/a0.java:
        long jLongValue = lValueOf != null ? lValueOf.longValue() : System.currentTimeMillis();
String appKey = this.f16792b;
kotlin.jvm.internal.g.f(appKey, "appKey");
kotlin.jvm.internal.g.f(deviceId, "deviceId");
String string = UUID.randomUUID().toString();
kotlin.jvm.internal.g.e(string, "randomUUID().toString()");
String strSubstring = string.substring(0, 10);
kotlin.jvm.internal.g.e(strSubstring, "this as java.lang.String…ing(startIndex, endIndex)");
String str2 = a.b.t(jLongValue + appKey + strSubstring + deviceId) + ' ' + jLongValue + ' ' + strSubstring + " v2";
w.a aVar2 = new w.a(wVar);
aVar2.c("X-UBT-AppId", str);
aVar2.c("X-UBT-DeviceId", deviceId);
aVar2.c("X-UBT-Sign", str2);
The key is used for request signing. The Python implementation concatenates a timestamp in milliseconds, the app key, a nonce, and a client device ID, then calculates an MD5 digest:
        timestamp = str(int(time.time() * 1000))
nonce = uuid.uuid4().hex[:10]
raw = timestamp + app_key + nonce + device_id
digest = hashlib.md5(raw.encode()).hexdigest()
signature = f"{digest} {timestamp} {nonce} v2"
The order and formatting matter because the server needs to reproduce the same value. This is also why copying a single captured header would only get me so far. My client needed to generate a new signature for each request.
Finding the algorithm still left the application settings to sort out. During implementation, a mismatched client configuration produced an “illegal client” response. I followed the app’s regional bootstrap flow. In CountryViewModel, it configures a bootstrap server using an app ID and key embedded in the APK. The interface in sources/jb/a.java declares a request to /catbox-server/app/areaMap.
That request is signed too. The embedded bootstrap key signs the region-discovery request, whose response supplies the regional app ID, app key, and API URL. The regional key then signs login and normal API requests. Following that chain let me obtain the matching US settings for my client.
From sources/com/ubtrobot/airpet/account/area/CountryViewModel.java:
        v.a aVar = new v.a();
String strM = t.m(application.getApplicationContext());
g.e(strM, "getDeviceId(application.applicationContext)");
aVar.a(new a0("970010044", "<redacted app key>", strM));
aVar.a(sVar);
aVar.f26434d.add(m.a());
v vVar = new v(aVar);
z.b bVar = new z.b();
bVar.f23318b = vVar;
bVar.c("https://jdm-oversea.airrobo-home.com");
From sources/jb/a.java:
        public interface a {
    @oh.f("/catbox-server/app/areaMap")
    Object a(zf.c<? super n<ServerResponse<List<AreaRegionUrl>>>> cVar);
}
There were a few similarly named fields to keep straight:
- X-UBT-AppId identifies the application configuration and needs to match the app key.
- X-UBT-DeviceId is a stable client/app-install identifier. It is also included in the signature calculation; it is not the litter box’s serial number.
- Authorization contains the account token returned by login.
- X-UBT-Sign contains the freshly generated request signature, even when the account token is still valid.
The login request separately hashes the account password with MD5. Its response includes token.token, the value to send in Authorization, and token.expireAt, the expiration time in milliseconds. I wrapped this in a small asynchronous HTTP client that reuses the token, logs in again shortly before expiration, and retries once after a 401.
The token structure is visible in my captured successful login response. I’ve redacted the credentials and omitted the account details.
From furrytail_login_response.json:
        {
  "token": {
    "token": "<redacted>",
    "expireAt": 1784094899156,
    "refreshToken": "<redacted>"
  }
}
With that in place, I could turn the vendor’s responses into useful API endpoints like /device/waste and /device/summary. That gave me the data for a dashboard. Making a cleaning button required another layer of work.
Finding the Command Path
The next clue came from something I did not see in Wireshark. When I pressed Clean in the app, there was no new HTTP request corresponding to the action.
For a moment, I wondered whether the app was talking to the box over Bluetooth. But I could also operate the box remotely, so Bluetooth would not explain the whole command path.
Looking more closely at the app’s startup requests, I found /v1/ubtechinc-im-manager/im/login. Its response included mqttUserName, mqttPassword, clientId, pubTopic, and subTopic. That gave me another protocol to investigate, plus the credentials and topics needed to connect.
From sources/gf/m.java:
        @o("/v1/ubtechinc-im-manager/im/login")
mh.b<UrcsResponse<MqttInfoBean>> c(@oh.a com.google.gson.m mVar, @oh.i("authorization") String str);
From sources/com/ubtrobot/urcs/connection/MqttInfoBean.java:
        public class MqttInfoBean {
    public String clientId;
    public String mqttPassword;
    public String mqttUserName;
    public String pubTopic;
    public String subTopic;
    public String uid;
}
After connecting to the broker as a subscriber, I pressed Clean again. This time I could see a message arrive. It was binary, which gave me the next problem to solve.
The command path uses MQTT. The app publishes a message to a broker, which routes it to the box. MQTT carries messages over its own connection. An already-open connection can carry a publish, so each button press needs neither a new HTTP request nor a new connection. This is the publish/subscribe model used by MQTT.
The HTTP API supplies the MQTT session credentials, and a contacts endpoint helps identify the device’s messaging user ID.
I needed to keep track of both the client sending the message and the litter box receiving it. The serial number used by the HTTP endpoints is not the destination field used by the messaging protocol.
My wrapper fetches the MQTT credentials at runtime and uses the device’s messaging ID to address commands. Now I had somewhere to send a message. I still needed to work out what that message should contain.
Four Bytes, Several Wrappers
At the center of a cleaning command is a small Protocol Buffers message:
        message d2c1019_intelligent_dev_airpet_op_rq {
  uint32 op_mode = 1;
  uint32 op_state = 2;
}
For a request to start cleaning, both values are 1. Serialized, the payload is just four bytes:
Unfortunately, publishing those four bytes is not enough. The device expects a series of wrappers around them:
        MQTT payload
└── IM Message
    └── MessageContent ("custom")
        └── google.protobuf.Any
            └── google.protobuf.BytesValue
                └── Command
                    └── RISP frame
                        ├── Header
                        └── Operation payload
There is quite a lot of packaging involved in asking a litter box to rotate.
The RISP frame starts with a magic byte, 0xDB, followed by the length of a serialized header. That header includes the device category, command number, payload length, request attribute, and sequence number. An operation request uses command 1019.
The frame also includes separate CRC-8 checksums for the header and payload. The implementation uses polynomial 0x07 with a final XOR of 0x55. These details are small, but they are part of the format the receiver expects.
The frame goes inside a protobuf Command. The serialized command is then wrapped in BytesValue, packed into Any, and placed in a custom instant-messaging message. That outer message carries the sender, recipient, message identifiers, timestamp, and protocol version.
The Any wrapper took some care. The outgoing message contains a BytesValue holding serialized command bytes. Packing the command directly into Any would produce a different message. Knowing the innermost schema only solves part of the problem.
Looking Inside the Running App
Decompiled code helped explain the structure, but I also wanted visibility into the bytes the app was building.
I added a Frida script to inspect several points in the serialization path. It hooks the operation request, the RISP converter, the command’s toByteArray, and the outer messaging object’s toByteArray. Each hook logs the bytes at that layer and returns the original result.
This makes the nesting much easier to inspect. Instead of trying to understand one large binary payload all at once, I can look at the operation bytes separately from the command wrapper and the final MQTT message.
I also added an Android log capture script and an MQTT subscriber that prints raw payloads alongside decoded messages. On the Python side, I recreated the protobuf definitions and generated serialization classes from them. That lets the code build messages from named fields instead of maintaining long strings of hex.
The decoder works back through the same layers, exposing the RISP header and known payload types. State responses include the work mode, work state, and sensor fields, which are much more useful for debugging than an unexplained byte array.
Bringing It Into Home Assistant
Once the message construction was in place, I could expose the operation through a normal HTTP endpoint:
curl -X POST http://localhost:8000/device/clean
The wrapper handles the MQTT login, builds the nested message, and publishes it. The recreated command successfully operated the physical box, which was a satisfying result after working through all those layers.
The API also supports clear and smooth operations, plus start, pause, resume, and stop states. Home Assistant buttons can call these endpoints without needing to know anything about protobufs or checksums.
For the data side, I added a script that pushes values into Home Assistant entities. It combines HTTP data, such as waste drawer percentage and visit history, with decoded MQTT state fields. This gives me a starting point for displaying the box’s status alongside the rest of the house.
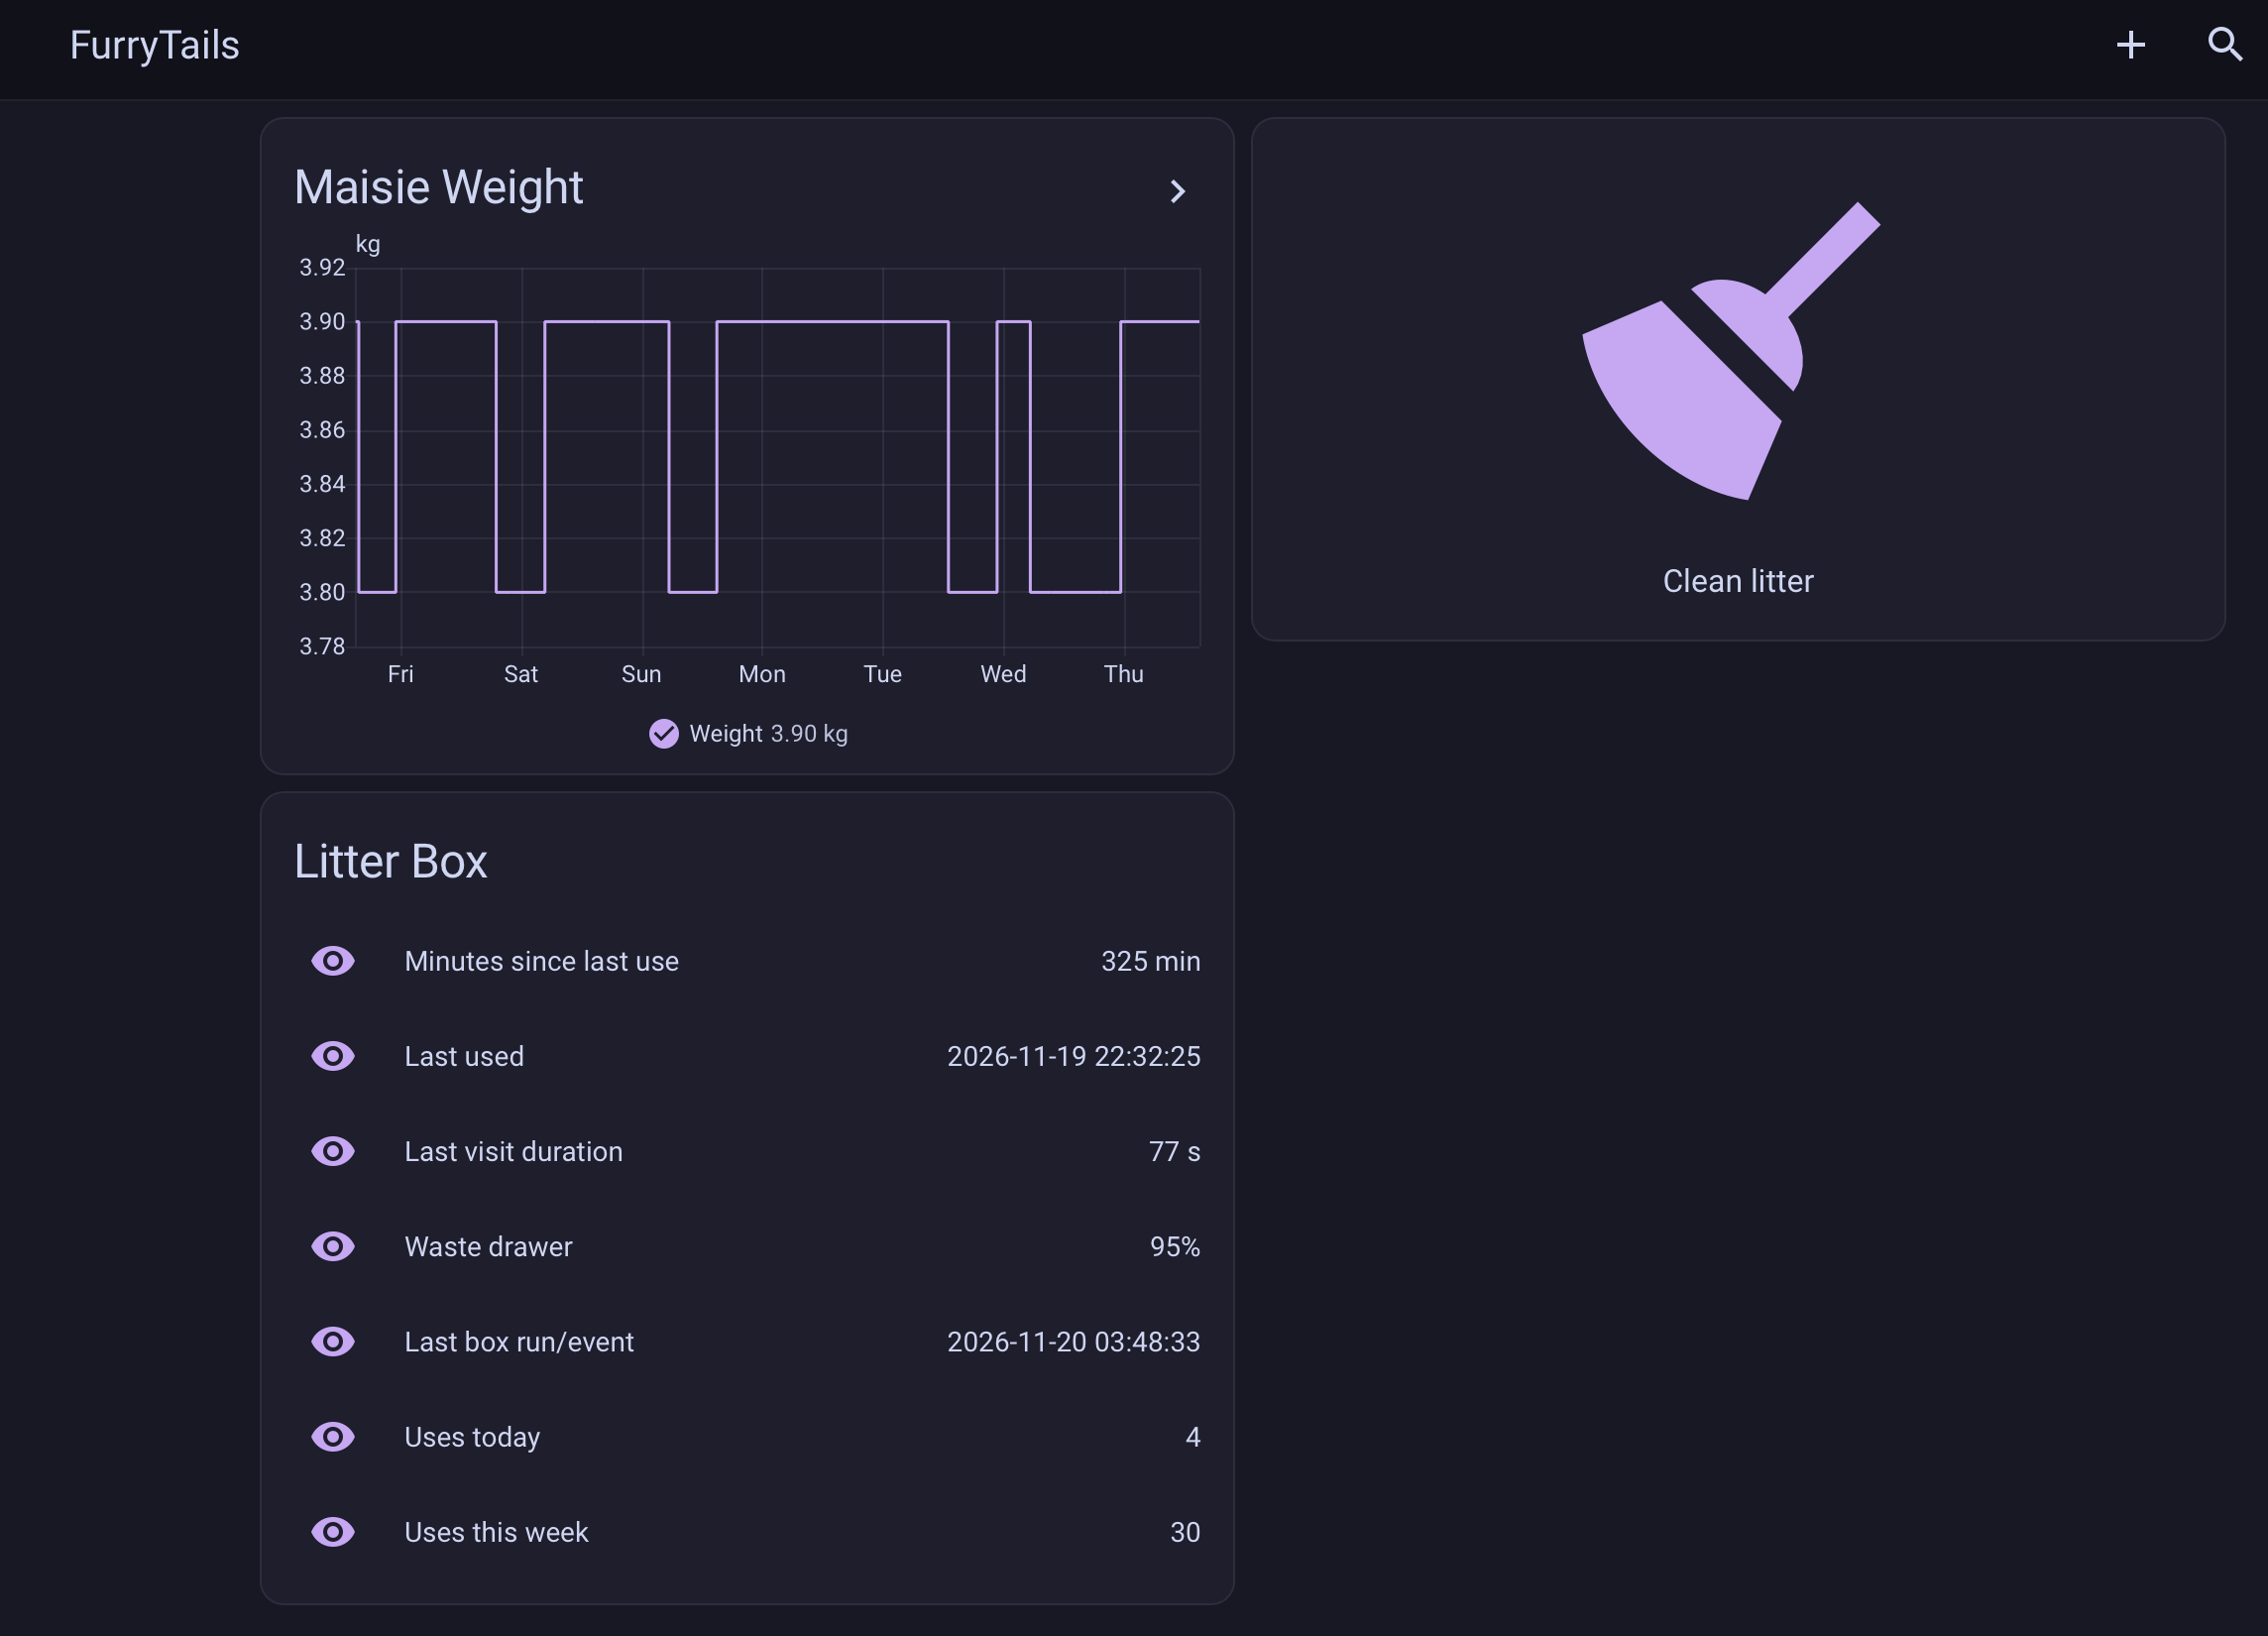
There is still a dependency on the vendor’s cloud. The service runs locally, but it uses the vendor’s HTTP API and MQTT broker to communicate with the box. What I have now is a bridge that lets my own tools use those interfaces.
Next, I want to add presence sensors and figure out when Maisie is occupied elsewhere. That was the idea that started this project. Getting a button to operate the box was the first milestone. Deciding when to press it should give me plenty more things to work on.
The code is on GitHub.